Installation and Setup
Microsoft's PowerBI is the platform of choice for dashboarding. PowerBI comes with a native connector for Snowflake.
You'll need the servername, the warehouse (basically: the virtual machine to use) and your username/password to set this up.
Download PowerBI desktop
Get PowerBI desktop from: https://www.microsoft.com/en-us/download/details.aspx?id=58494
For future reference and support from Paxon ⸗ Active Ants, please download the English version.
Install the application.
Connecting to Snowflake
Start up PowerBI desktop.
Start with a blank report.
Click on "Get data from another source ->".
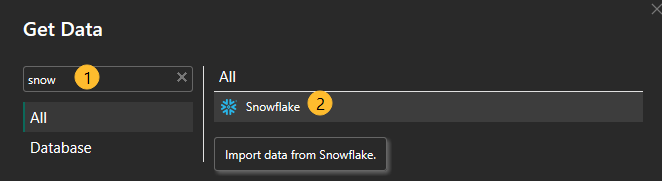
Search for "Snowflake" (just type it in, or look for it under the Database section).
Type in Servername (1): astunbh-ln60614.snowflakecomputing.com
Type in Warehouse name (2): WH_EXTERN_PRD
Hit OK (3):

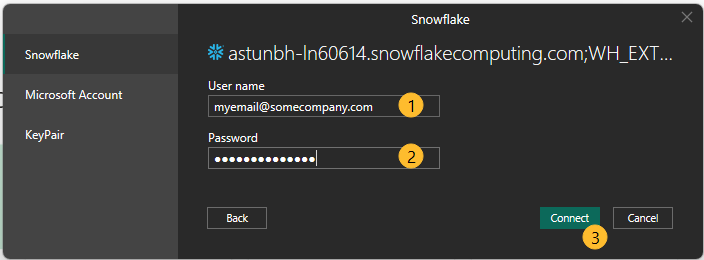
Set the username (1) and password (2), hit "Connect" (3):
If something goes wrong, see the section on "reset connection in PowerBI".
Instead of username/password, you can also authenticate using a public/private keypair — see Keypair Authentication.
In the Navigator, select the views from DWH_DEV (1) - IA_EXTERN (2) that you want to load to your dashboard (e.g. Countries (3) and Orders (4)): 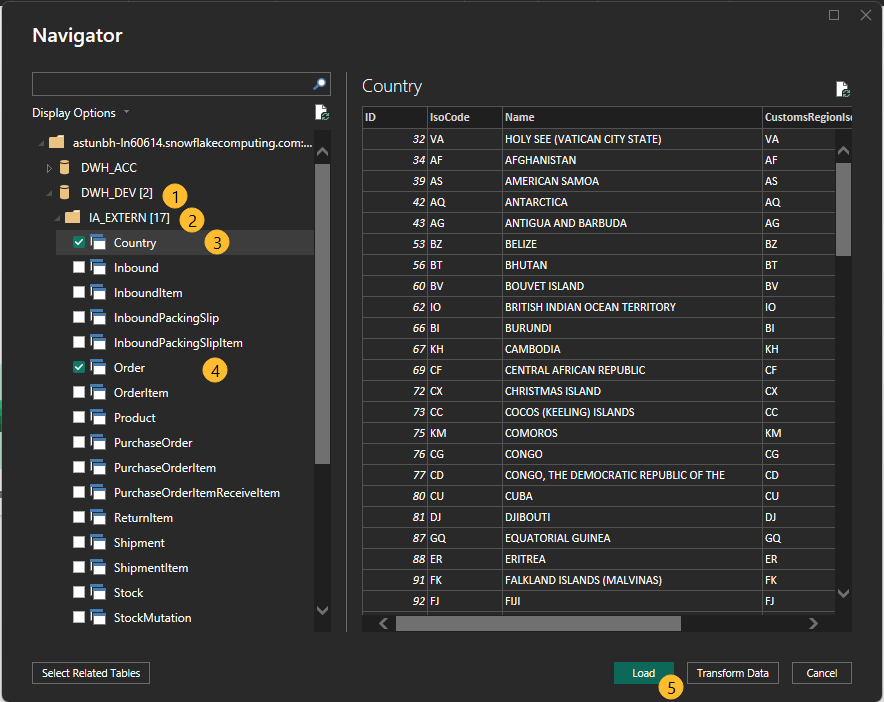
Hit "Load" (5). Then specify how you want the data to be imported: 
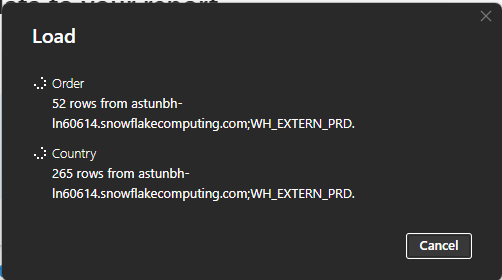
Typically you'll select "Import" (1) here. If you use "DirectQuery" it might run into limitations when you load more than 1 million records. Hit "OK" (2) and the data will start loading. This takes a while, depending on connection and volume of data.
Reset connection in PowerBI
If you made a mistake in PowerBI when setting up your credentials to Snowflake, you'll notice that it is near impossible to change your settings. PowerBI is known for this.
The safest way to reset your login credentials is this:
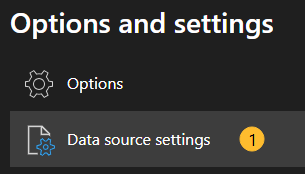
- Go to "File - Options and Settings", select "Data source settings":
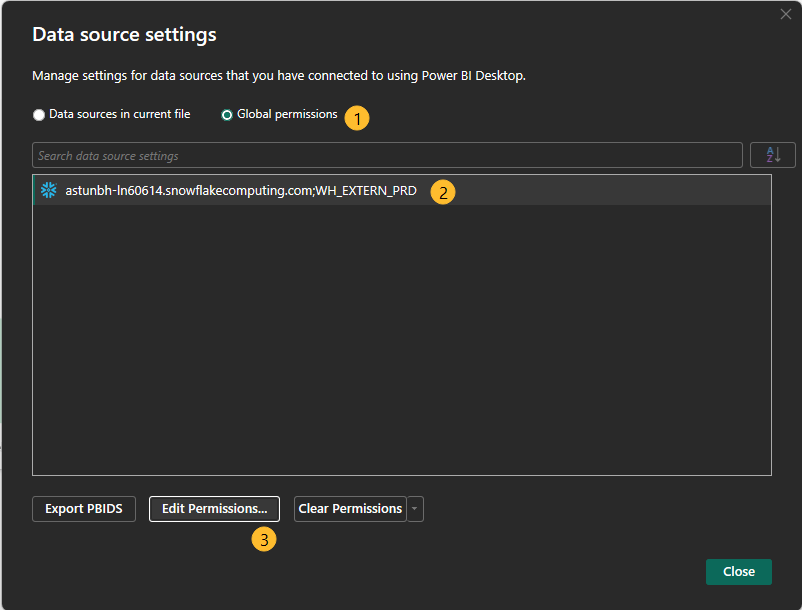
- Select "Global permissions" (1), then your Snowflake connection (2), then "Edit Permissions..." (3):
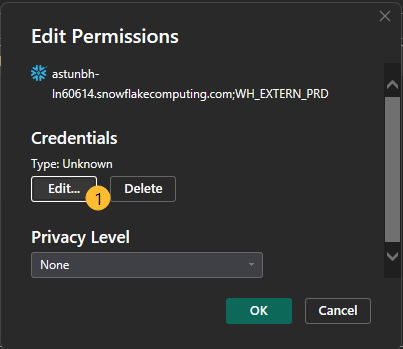
- Select "Edit" (1):
-
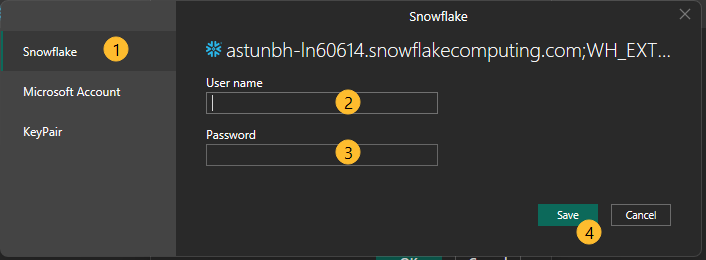
Select "Snowflake" (1), and set Username (2) and Password (3), hit "Save"" (4):
-
"OK" out of these screens and continue with setting up your dashboard.